How the game text in The Sentinel is tokenised to save space
There isn't a lot of text in The Sentinel, but there's still enough to justify compressing it with a text tokenisation system, as absolutely every byte counts in this game (see The Sentinel memory map for details).
The system used is a simplified version of the text tokenisation system from Revs. The latter system is more complicated as it needs to encode teletext control codes for all the menu screens, but The Sentinel only needs to encode some simple positioning and colouring information, plus the text itself.
You can read about the more complex system in the Revs deep dive on text tokens, but we'll stick to examining The Sentinel's simpler offshoot here.
Text token strings
------------------
The compression system used in The Sentinel is relatively simple. The game contains 18 text tokens that are numbered from 0 to 17. Each of these tokens has an associated string of text, labelled token0 through token17 in the source code. This string contains not only the text for that token, but it can contain other tokens too, and because the BBC Micro encapsulates a number of graphics commands via its VDU system, we can also encode commands such as colour changes and cursor movements.
Each token's string is a sequence of bytes. These bytes have the following meanings:
| Token | Meaning |
|---|---|
| 0-199 | Print character n (where n is ASCII or a VDU control code) |
| 200-217 | Print token n - 200 (i.e. token 0 to 17) |
| 255 | End of token |
Let's look at an example to see how this works. Text token 1 is designed to be printed once the player has pressed a key on the main title screen, so it gets printed when the screen looks like this:

And it turns the screen into this:
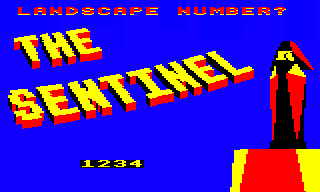
Note that the black text box and "1234" text are displayed by other parts of the code rather than the text token. Instead, the text token deals with removing the "PRESS ANY KEY" text, printing "LANDSCAPE NUMBER?" along the top, and getting things ready for the black input field.
Text token 1 is defined at token1, which looks like this:
  .token1

   EQUB 200 + 12         \ Text token 12: Move graphics cursor to (64, 100)

   EQUB 200 + 15         \ Text token 15: Print five spaces

   EQUB 200 + 15         \ Text token 15: Print five spaces

   EQUB 200 + 16         \ Text token 16: Print three spaces

   EQUB 200 + 7          \ Text token 7: Move the graphics cursor to (64, 768)

   EQUB 200 + 13         \ Text token 13: Print "LANDSCAPE"

   EQUS " NUMBER?"       \ Print " NUMBER?"

   EQUB 4                \ VDU 4
                         \
                         \ Write text at the text cursor

   EQUB 31, 5, 27        \ VDU 31, 5, 27
                         \
                         \ Move the text cursor to (5, 27)

   EQUB &FF              \ End of token
We can print this token by calling the PrintTextToken routine with X = 1.
The first byte in the token string above has a value in the range 200 to 217, which indicates we should print another token. In this case it's token 12, which looks like this:
  .token12

   EQUB 25, 4            \ VDU 25, 4, 64; 160;
   EQUW 64               \
   EQUW 160              \ Move graphics cursor to absolute position (64, 100)

   EQUB &FF              \ End of token
This writes the standard VDU command to move the graphics cursor to (64, 100), which is where the main title screen already printed "PRESS ANY KEY".
Next we print 13 spaces in three batches, which removes the "PRESS ANY KEY" text from the screen, and then we move the graphics cursor to (64, 768), which is along the top of the screen, before printing "LANDSCAPE NUMBER?".
Finally we do a VDU 4 command so we print text at the text cursor rather than the graphics cursor, and then we move the text cursor to (5, 27). This positions the cursor ready for the four-character landscape number input field (i.e. the "1234" box in the screenshot above), which is drawn and managed by calling the ReadNumber routine after the text token has finished printing.
If you look at the title screen, you'll notice that text is printed with a drop shadow. This effect is implemented in the PrintCharacter routine, which prints the sequence of VDU commands at vduShadowRear and vduShadowFront to produce the drop shadow effect.
The first step is to poke the ASCII code of the character to print into the first byte of the vduShadowRear and vduShadowFront tables. Then the drop shadow is printed by first printing the VDU commands in vduShadowRear, to print the rear character in yellow, and then in vduShadowFront, to print the front character in red or cyan.
The rear character is offset down from the front character by four graphics units, which equates to an offset of one pixel in mode 5.
The VDU commands are printed backwards, because that makes the loop condition slightly simpler, and it also means we can poke the characters to print into the start of each block of VDU commands, knowing that they will then be printed last in each VDU sequence.
All the text tokens in The Sentinel
-----------------------------------
The table below lists all the text tokens in The Sentinel. Click on the token names to see the exact breakdown of each byte in each token:
| Token | Text |
|---|---|
| token0 | Set the background colour to blue Print "PRESS ANY KEY" at (64, 100) Set the text background to black |
| token1 | Print 13 spaces at (64, 100) Print "LANDSCAPE NUMBER?" at (64, 768) Switch to text cursor Move text cursor to (5, 27) |
| token2 | Set the background colour to blue Print "SECRET ENTRY CODE?" at (64, 768) Switch to text cursor Move text cursor to (2, 27) |
| token3 | Set the background colour to blue Print "WRONG SECRET CODE" at (64, 768) Print "PRESS ANY KEY" at (64, 100) Set the text background to black |
| token4 | Set the background colour to black Print "PRESS ANY KEY" at (192, 64) Print "LANDSCAPE" two chars right of (64, 768) Move cursor right |
| token5 | Print "SECRET ENTRY CODE" at (64, 768) Print "LANDSCAPE" at (192, 704) Move cursor right |
| token6 | Print "PRESS ANY KEY" at (64, 100) |
| token7 | Move the graphics cursor to (64, 768) |
| token8 | Move the graphics cursor to (192, 704) |
| token9 | Move the graphics cursor to (192, 64) |
| token10 | Configure text to be printed at the graphics cursor Set the background colour to colour 0 (blue) |
| token11 | Configure text to be printed at the graphics cursor Set the background colour to colour 1 (black) |
| token12 | Move graphics cursor to (64, 100) |
| token13 | Print "LANDSCAPE" |
| token14 | Print "SECRET ENTRY CODE" |
| token15 | Print five spaces |
| token16 | Print three spaces |
| token17 | Print "PRESS ANY KEY" |
Note that the coordinates for positioning the text cursor in the text tokens might seem a bit strange; for example, the landscape number entry box in the above example is positioned at text coordinates (5, 27), which means text column 5 on row number 27. Text rows count down from row 0 at the top of the screen, so this puts the cursor on the 28th character row... but as discussed in the deep dive on the custom screen mode, the game screen is only 25 rows tall, and in the title screens it's one less, with a height of 24 character rows. So why isn't text row 27 off the bottom of the screen?
The reason is that the while the custom screen mode might have fewer character rows, the operating system doesn't know about this, as we create the custom screen mode by reprogramming the 6845 directly. The text system in The Sentinel uses the operating system's OSWRCH routine to write text to the screen, which therefore writes text to the screen as if it were a normal mode 5 screen. In terms of screen memory, you can think of the custom screen as occupying the bottom portion of the standard mode 5 screen, and we just reuse the top part for game code and don't display that part; so when setting the text cursor, we have to specify a row number in the VDU command that is relative to where the top of where mode 5 would normally be, rather than the top of the custom screen mode.
This issue doesn't apply to the graphics-related VDU commands, as the graphics origin is in the bottom-left of the screen, while the text origin is in the top-left.